All Categories
Featured
Table of Contents
- – Swamp Cooler Repair Company Beverly Hills, CA
- – Instant Air Solutions
- – Swamp Cooler Leak Repair Beverly Hills, CA
- – Evaporative Cooling Repair Beverly Hills, CA
- – Swamp Cooler Repair Service Beverly Hills, CA
- – Swamp Cooler Repair Near Me Beverly Hills, CA
- – Swamp Cooler Pan Repair Beverly Hills, CA
- – Swamp Cooler Replacement Beverly Hills, CA
- – Evaporative Cooler Pump Repair Beverly Hills...
- – Evaporative Cooling Repair Near Me Beverly H...
- – Commercial Swamp Cooler Repair Beverly Hills...
- – Swamp Cooler Repair Service Beverly Hills, CA
- – Swamp Cooler Copper Line Repair Beverly Hill...
- – Swamp Cooler Repair Beverly Hills, CA
- – Evaporative Cooler Motor Repair Beverly Hill...
- – Evaporative Cooling Repair Near Me Beverly H...
- – Instant Air Solutions
Swamp Cooler Repair Company Beverly Hills, CA
The even more humid the air, the higher the wet-bulb temperature. The temperature level distinction between the dry-bulb temperature level and wet-bulb temperature is dependent on the quantity of water vapor in the ambient air, as gauged by relative humidity.
When the family member humidity is 100%, the wet-bulb temperature level will amount to the dry-bulb temperature level (so evaporative cooling can not take place). If the loved one humidity is less than 100%, the wet-bulb temperature level will be less than the dry-bulb temperature. The distinction between the wet-bulb temperature and the dry-bulb temperature is referred to as the wet-bulb depression.
Because of this, evaporative colders function well in completely dry locations of the country such as the Southwest. A location can be assessed based upon its 1% design conditions. The 1% style temperature is nearly the highest possible temperature an area will typically see: it is statistically exceeded just 1% of the moment.
The wet-bulb depression would certainly be 38F (108 70 = 38). In these outside conditions, evaporative colders would certainly work extremely well. Nevertheless, in Sarasota, Florida, when the exterior temperature level is 92F and the accidental wet-bulb temperature is 79F, the wet-bulb anxiety is only 13F (92 79 = 13); below an evaporative colder would certainly not work quite possibly.
Swamp Cooler Leak Repair Beverly Hills, CA
As a basic regulation, areas with wet-bulb temperatures of 70F or reduced are ideal for evaporative air conditioning. See the Climate tab for more information. Average wet-bulb temperature levels throughout the USA. (Resource: Home Energy 1996)The efficiency of evaporative colders is not gauged in SEER (seasonal power performance ratio), which is the efficiency dimension utilized for conventional cooling systems.
The numbers in environment-friendly stand for supply air temperature levels that can offer reliable air conditioning for comfort conditions. The numbers in blue are borderline, and the numbers in red will typically not provide typical interior convenience conditions, though they would improve indoor problems significantly as contrasted to utilizing no air conditioning at all.
Evaporative Cooling Repair Beverly Hills, CA
Evaporative colders are sized by air movement rate in cubic feet per min (CFM). They are not sized by "loads of cooling down" like conventional ac system. Typical evaporative colder sizes vary from 3,000 to 6,500 CFM. To identify what dimension device is required for a certain home, the principle of air changes per hour (ACH) is utilized.
The moist air is worn down out while cooled down dry air is blown right into the area. The air after that goes into the second, straight air conditioning stage where it moves through damp pads just like a direct evaporative cooler to be more cooled and humidified prior to moving into the home.
Inside the housing, a haze of water is constantly sprayed on the condenser coils to eliminate warmth from the cooling agent and at the exact same time minimize the job of the compressor. Unlike typical ac system, which utilize 10% more power for each and every 10F boost in temperature over 95F, an evaporative-cooled condenser draws the same power over a large range of exterior temperatures.
Swamp Cooler Repair Service Beverly Hills, CA
Evaporative colders have been created that usage panels to develop the power used to run the blower and the water pump. For hot desert areas, the mix of evaporative cooling and solar power is a best suit: the mid-day, when solar energy is readily available, is additionally the most popular component of the day, when cooling is most needed.
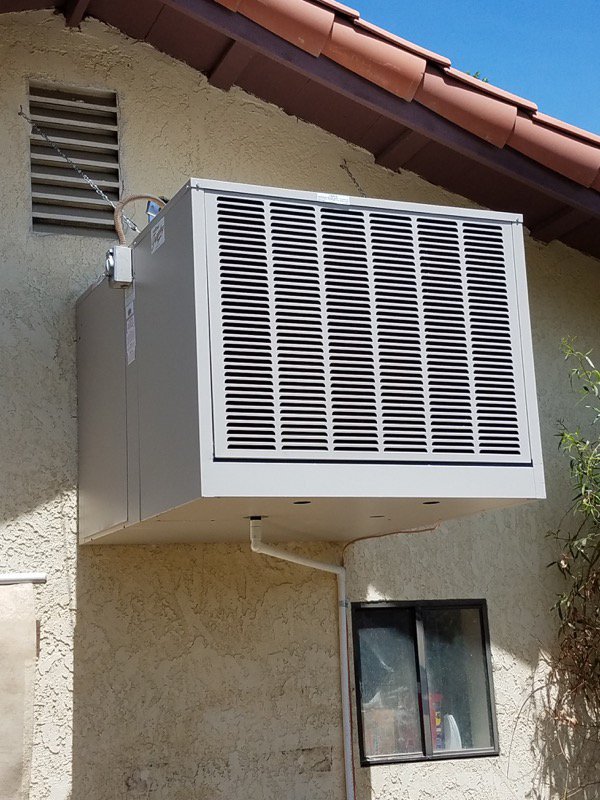
Ideally, mount on the ground or wall instead than roofing system to make maintenance simpler for the house owner. Make sure the place can be fairly provided with electrical energy, control electrical wiring, plumbing, and ductwork if needed. Mount in a main area for finest air circulation. Select an evaporative cooler that supplies air flow comparable to the CFM calculated symphonious 2.
Select a design with a cover to lessen maintenance throughout the off-season. If there is ductwork, size per ACCA Handbook D.Install ceiling vents with barometric or mechanically operated dampers. Supply 2 ft2 of unrestricted air alleviation for every 1,000 CFM of air delivery. Beverly Hills Repair Swamp Cooler Belt. Screens and louvers on relief vents will certainly restrict airflow, so air vent area has to be boosted to represent this.
Swamp Cooler Repair Near Me Beverly Hills, CA
Typically overload coolers can be located in those climates that are dry and warm. Overload colders in fact work by a procedure that is frequently called evaporative cooling and are hence acknowledged as evaporative a/c unit. This is in some way the like the human body functions to eject warmth via the sweating procedure.
Evaporative pads are the inside of the swamp cooler. They are in fact the damp pads that are generally utilized to cool down the flow of air.
Swamp Cooler Pan Repair Beverly Hills, CA
The motor in the overload cooler is usually used to boost the blower. As a response, it draws air into the pertinent tube, and afterwards it assists in cooling the home or the area that has actually to be cooled. The motor has a tendency to be between and 1 horsepower and uses 115 to 120 volts of energy.
It is essentially used to regulate the water degree that is currently there within the colder. When the water degree climbs, the float degree climbs also. When the water reaches a particular degree, the float is made use of to shut down the supply of water valve. The float is made use of to prevent the overload cooler from bursting and make it sure that it works accurately.
Swamp Cooler Replacement Beverly Hills, CA
It helps in forcing the water with all the supply lines, assuring that the evaporative pads stay damp. If these pads are not damp as required, you will certainly be a lot more most likely to really feel the requirement to alter and change the pump in time. If the pump is still functioning however the pads are not suitably damp, you will most likely have to increase the pump dimension.
This normally comes from the within your home and is utilized to link the cooler to the pipes system. This shutoff is connected to the cooler with the aid of a copper tube. This is important to the feature of the swamp cooler. The cord link box is the reason that the power supply can enter the overload cooler.
The drainpipe is a tube that is located near the base of the cooler and can be eliminated to drain water out totally. Furthermore, if the water degree begins to increase expensive then the water will certainly drain out through the center of television. This can spill onto the ground, making it much easier to discover if there are any kind of issues in the overload cooler.
It must likewise be appropriately associated inside the cooler if it is to work. V-belts come in different dimensions, and you ought to take care to pick the correct dimension belt.
Evaporative Cooler Pump Repair Beverly Hills, CA
Read: What is a Swamp Cooler? You might have seen someplace that most of the weight of an overload cooler extends outside your house, so that is specifically where the support bracket ought to be used. It generally comes with a cooler, so you simply have to follow the firm's directions for installing it in an appropriate way.
All you have to do is to level the brace with a 4-foot degree prior to driving the fastenings into the siding with a drill or socket wrench. The majority of the overload coolers are created as though they can be installed in windows that usually opens vertically. In order to set up a swamp cooler, you require to open up the window right and with an aid of a labor, placement this overload cooler so it is resting on the bracket and home window sill and the indoor part is inside the room.
All you need to do is to secure it with 2 1 1/4-inch screws and after that seal both of the ends of the fins with a silicone seal. Repeat with the fin that takes place the various other side. After that close the window and secure the space between the window and the top of the colder with caulk.
Evaporative Cooling Repair Near Me Beverly Hills, CA
A float shutoff in the tank ought to transform off the water when the tank is full. Afterwards plug the device right into a 120-volt GFCI electrical outlet and afterwards turn it on and make certain it is running efficiently. Kitchen Solutions is a leading a/c company in Los Angeles, Santa Monica, and about.
: Lower the window sash up until it hinges on top of the colder, protecting it in position. If needed, make use of braces or screws provided with the cooler to attach it to the window framework for included stability.: Usage weather removing, foam, or other shielding materials to secure any kind of spaces around the cooler.
Commercial Swamp Cooler Repair Beverly Hills, CA
Change the setups and inspect that water flows effectively over the pads which the follower strikes cool down air into the room.: On a regular basis inspect the water degree, tidy the pads, and make sure the cooler is operating successfully. Make sure that the window can sustain the weight of the cooler and take safety measures to stop it from falling.
Below's a general instruction:: Make sure the power is off at the breaker to avoid electric hazards.: Open up the electric box on the overload cooler, typically situated near the motor.:: Link the electric motor wires to the corresponding terminals in the electric box. Generally, black is warm, white is neutral, and eco-friendly is ground.
Swamp Cooler Repair Service Beverly Hills, CA
: If making use of a thermostat, link its cables to the motor and pump terminals according to the thermostat's circuitry diagram.: Usage cable nuts or connectors to safeguard all connections, making sure there are no loose or revealed wires.: Ensure all elements are effectively grounded to stop electric shocks.: Once wired, transform the power back on and check the system.
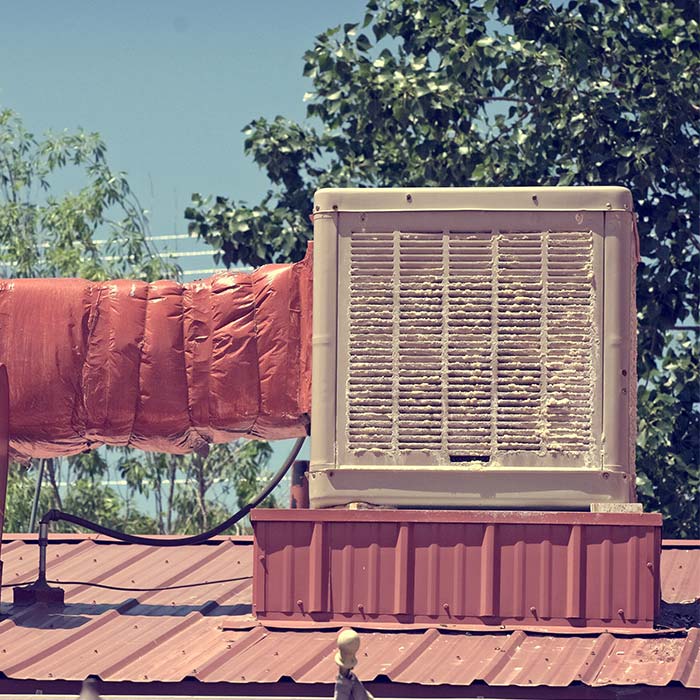
You will still need an assistant though, and you have to ensure that you have actually purchased the right-sized overload cooler that will meet all your needs. Usually, the overload cooler is seen installed on a roof covering. As we understand that the air conditioning unit attract dampness out of the air, swamp colders actually cool with the opposite effect by adding so it includes moisture to the air that it blows out.
To connect an overload cooler, adhere to these actions:: Put the cooler where it can pull in fresh air, usually near a window or vent.: Link the cooler to a water resource using a hose or copper tubing. Affix the line to the water inlet shutoff on the colder.
: Connect the cooler into a power electrical outlet or connect it to your home's electrical system if hardwiring is required.: Connect a drainpipe tube to the colder's overflow drainpipe to take care of excess water.: Make certain the water reservoir is filled up and the float valve is working correctly.: Beginning the cooler, readjusting the follower rate and water flow to your wanted setups.
Swamp Cooler Copper Line Repair Beverly Hills, CA
Pick a safe and secure, level place with access to power and water. Raise and protect the colder to the mount. Utilize a copper or plastic water supply line: Affix the saddle shutoff to a cool water pipeline.
Readjust the settings and check that water flows properly over the pads and that the fan blows cool air into the room.: On a regular basis inspect the water level, clean the pads, and make certain the cooler is operating effectively. Make certain that the home window can sustain the weight of the colder and take precautions to stop it from dropping.
Swamp Cooler Repair Beverly Hills, CA
Here's a basic guideline:: Make certain the power is off at the breaker to avoid electric hazards.: Open the electrical box on the swamp cooler, normally situated near the motor.:: Connect the motor cords to the matching terminals in the electric box. Generally, black is hot, white is neutral, and environment-friendly is ground.
: If utilizing a thermostat, attach its cables to the electric motor and pump terminals according to the thermostat's wiring diagram.: Usage cable nuts or adapters to protect all links, making certain there are no loosened or revealed wires.: Ensure all parts are effectively based to protect against electric shocks.: When wired, transform the power back on and evaluate the system.
Evaporative Cooler Motor Repair Beverly Hills, CA
You will certainly still require an assistant though, and you need to make certain that you have actually acquired the right-sized swamp cooler that will satisfy all your requirements. Normally, the overload cooler is seen set up on a roof covering. As we understand that the air conditioners attract moisture out of the air, swamp colders in fact cool with the contrary impact by adding so it includes moisture to the air that it strikes out.
To hook up an overload cooler, comply with these actions:: Position the cooler where it can attract fresh air, typically near a window or vent.: Link the cooler to a water resource using a tube or copper tubing. Beverly Hills Repair Swamp Cooler Belt. Affix the line to the water inlet valve on the colder
: Plug the cooler into a power electrical outlet or link it to your home's electrical system if hardwiring is required.: Connect a drainpipe hose pipe to the colder's overflow drain to manage excess water.: Make certain the water tank is filled up and the float valve is functioning correctly.: Beginning the cooler, adjusting the follower rate and water flow to your wanted setups.
Evaporative Cooling Repair Near Me Beverly Hills, CA
Instant Air Solutions
Address: 412 W Dryden St Apt 6 Glendale, CA 91202Phone: (747) 307-6363
Email: [email protected]
Instant Air Solutions
Choose a protected, flat place with accessibility to power and water. Install a rooftop placing bracket or curb. Lift and safeguard the colder to the install. Connect ductwork to the home's air flow system. Hook up water and electrical lines. Seal all voids to avoid leakages and make sure air flow. Make use of a copper or plastic water line: Connect the saddle shutoff to a chilly water pipe.
Evaporative Cooling Repair Near Me Beverly Hills, CACommercial Swamp Cooler Repair Beverly Hills, CA
Evaporative Cooler Installation Beverly Hills, CA
Swamp Cooler Repair Service Beverly Hills, CA
Swamp Cooler Repair Company Beverly Hills, CA
Finding A Seo Company Near Me Beverly Hills, CA
Near Me Seo Pricing Beverly Hills, CA
Repair Swamp Cooler Belt Beverly Hills, CA
Instant Air Solutions
Table of Contents
- – Swamp Cooler Repair Company Beverly Hills, CA
- – Instant Air Solutions
- – Swamp Cooler Leak Repair Beverly Hills, CA
- – Evaporative Cooling Repair Beverly Hills, CA
- – Swamp Cooler Repair Service Beverly Hills, CA
- – Swamp Cooler Repair Near Me Beverly Hills, CA
- – Swamp Cooler Pan Repair Beverly Hills, CA
- – Swamp Cooler Replacement Beverly Hills, CA
- – Evaporative Cooler Pump Repair Beverly Hills...
- – Evaporative Cooling Repair Near Me Beverly H...
- – Commercial Swamp Cooler Repair Beverly Hills...
- – Swamp Cooler Repair Service Beverly Hills, CA
- – Swamp Cooler Copper Line Repair Beverly Hill...
- – Swamp Cooler Repair Beverly Hills, CA
- – Evaporative Cooler Motor Repair Beverly Hill...
- – Evaporative Cooling Repair Near Me Beverly H...
- – Instant Air Solutions
Latest Posts
Laguna Hills Payroll Service Providers
Repair Swamp Cooler Pan Sun Valley
La Canada Flintridge Hvac Repair Contractor
More
Latest Posts
Laguna Hills Payroll Service Providers
Repair Swamp Cooler Pan Sun Valley
La Canada Flintridge Hvac Repair Contractor